Peter Mount's Blog
Various ramblings on virtually everything

Saturday, July 11, 2009

Turn your Mac into a Wifi Base Station

Some people like myself use mobile broadband for their internet connection, either because it’s the only option where they live or like me have had enough of BT (in the UK you usually still need BT for the physical line regardless of the ISP).

Now with the various dongles they work fine on the the local machine and for the local wired network its usually as simple as turning on Internet Sharing (for the 3 network you have to do things differently due to them using a special profile). The problem comes to when you want to share the connection via wifi - but don’t have a wifi router.

On Linux boxes some wifi chipsets support base station mode but things become complicated due to having to configure the card, the firmware etcetera... but what about on a Mac? All recent Mac’s have AirPort cards so can a Mac act as a base station?

To put it simply, yes and it’s supported as standard (I’m using OSX10.5.7). Not only that it can be enabled from a couple of extra clicks.

First open System Preferences and select Sharing:

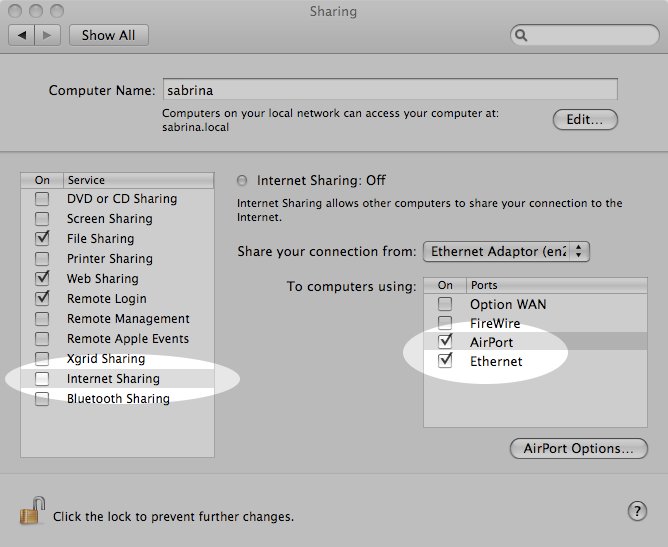
Next Select (not check) Internet Sharing and make sure AirPort is turned on (I also have Ethernet enabled as well).

Now at this point when you turn on sharing the WiFi connection will be open to anyone - so it’s probably advisable to turn on encryption by Selecting AirPort Options:

That’s all there is to it. You simply turn it on by turning Internet Sharing on and pressing start.

Saturday, February 28, 2009

Nikkai A88JB FreeView PVR

Maplin currently have some special offers on at the moment and one of them is the Nikkai A88JB USB PVR Digital TV Receiver for £39.99. Now I wasn’t really in the market for a new receiver but what caught my eye was that, unlike other standalone Freeview boxes with a card slot or usb port, this one supposedly records onto an external HD connected to the USB port - so I thought I’d give it a try.

First the manual - what crap. It looks like it’s a photocopy of some original written in the usual pigeon english you’d expect of something mass made in China.

As for the unit, it doesn’t look that well built with three buttons on the front (Power, Channel Up and Down) and a display showing the time when in standby or the channel number. On the right hand side there’s a cover which when opened shows the SD/MMC slot and the USB port.
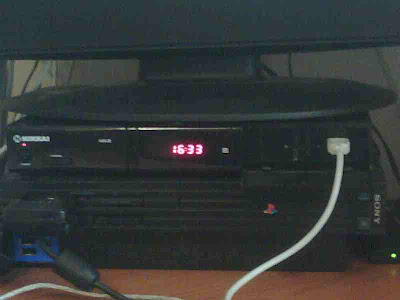
View of the unit sitting on top of my old PS2.

The white cable is plugged in to the USB port and connects an old USB Harddrive to the unit.

Once plugged in it runs relatively well. Scanning for channels is quick and when in use it’s a lot more responsive than my existing Freeview box (built into the TV).(a lot quicker than the one I’ve been using) and the user interface is not the best I’ve seen - I’ve seen better with units far cheaper than this one, but at least it works.Now apparently it has text support but I can’t get that to work, and you cannot record radio (no big deal there), but the main thing is the recording of programs.

Recording live TV is simple, just press REC and it records. To stop you’d have thought you would press the stop button next to it but no, it’s press REC again then confirm by pressing left and Enter - 3 button presses when there’s a button next to it!

Playback from the unit appears fine as well, but the timer is sheer crap. You can only program in up to 8 timers and you can set them with the date, time and channel and if it occurs once, every day, week or year (why?). It takes me back to programming VHS recorders twenty years ago.

So, now begs the question - can the recordings be played back on the Mac?

Well, the files are stored on the HD as .mpg files and they are readable. However Quicktime doesn’t recognise it (this is with Perian installed). Not looking good so far. I then tried Media Player 10 that I have installed inside VMWare and again no go. Media Player plays the audio but could not find a video codec.

Not wanting to give up on 40 quid I then turned to good old Open Source.

So I fired up VideoLan and tried playing the recorded program - presto it works.

A test recording being played with VLC on Mac OSX10.5

Now if VideoLan works on the Mac then will it work with Linux? Yep even on Linux it will play a recording :-)

A test recording being played with VLC running on Ubuntu 8.10

So all in all it seems that it might be a decent unit. The timers could do with some work, and it looks ugly with the USB cable showing from the front (no rear USB port), but it might be a good buy - we’ll see.

I’m going to set it up to record some shows during the next week (ones on whilst I’m at work) and see how it performs, so expect an update next week.
Thursday, February 12, 2009

Connecting to both local lan and 3's 3G Dongle on the Mac

A problem reported elsewhere on the net with 3’s 3G Broadband dongles is that while you are connected to the net it disconnects you from your local lan preventing you from accessing both. I presume its to prevent people from sharing the broadband without using their dedicated router which they sell to connect the dongle direct to the lan.


Anyhow the main problem for me is that when using a VPN with the dongle, the Mac could connect to the remote network fine, but Windows or Linux running inside VMWare could not as the dongle broke the network. This was causing me problems as I need to access MSSQL on the odd occasion.


Anyhow I’ve managed to figure out a way to allow the local lan to be connected at the same time with the dongle. In fact it’s so simple it’s stupid and I’m surprised no one has documented this anywhere else online - at least I never found it and various forums I’ve seen this question on don’t have this solution.


The trick is:

  1. Connect to the net
  2. Open System Preferences and click on Network
  3. You should see 3Connect in the Location dropdown - if not make sure it’s visible
  4. On the left you should see the list of interfaces (Ethernet, Bluetooth etc) all greyed out.
  5. Click on the + at the bottom left corner of that list and a popup appears.
  6. Select Ethernet in the Interface dropdown then press Create
  7. Now if you use DHCP like I do thats it - DHCP will kick in within a few seconds.
  8. If you don’t use DHCP then simply configure the new interface with a local static IP.


That’s it - nice and simple. Your milage may vary with this, but at least it worked for me.


Here’s the screenshot where you can see Ethernet 2 connected and the Dongle (disconnected when I took this screenshot):


Sunday, January 04, 2009

How to change the Blue Screen of Death into another colour

We have all had a BSOD (Blue Screen Of Death) when something catastrophic has happened with Windows - which is usually when you try to do anything useful, but if you get tired of it being the standard Blue or if you have a visual imparement so the default settings are useless for you, here’s how to change it. First open the SYSTEM.INI file found in the %systemroot% folder (usually C:\Windows) and locate the [386enh] section. Add the following two entries if they are not present: MessageBackColor= MessageTextColor= Each of those entries take a single hexadecimal digit defining the colour:
  • 0 - Black
  • 1 - Blue
  • 2 - Green
  • 3 - Cyan
  • 4 - Red
  • 5 - Magenta
  • 6 - Yellow
  • 7 - White
  • 8 - Grey
  • 9 - Bright blue
  • A - Bright green
  • B - Bright cyan
  • C - Bright red
  • D - Bright magenta
  • E - Bright yellow
  • F - Bright white
So to change it to Cyan and bright white text, then use the following: MessageBackColor=3 MessageTextColor=F The settings will take effect the next time you restart Windows. NB: The values must be in upper case hence using F and not f in the above example.